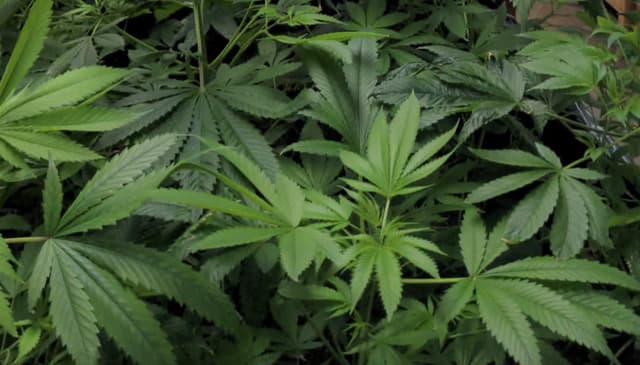
How to Grow Marijuana at Home
- Minnesota Cannabis
- How to Grow at Home
Cannabis is legal in Minnesota. Statistically, approximately 6 percent of adults aged over 21 grow their own weed in the states with legalized recreational use. In Minnesota this means over 200,000 small-scale home-growing operations.
Growing Cannabis Outdoors in MN
Growing cannabis outdoors in Minnesota is illegal, except for licensed cannabis cultivators:
While marijuana plants can be grown outdoors in Minnesota, the natural warm growing season is short, resulting in a poor and underdeveloped crop. Outdoor cultivation can be done from late spring to early fall (late April to early October), but once the weather starts cooling off, you need to move the crop indoors, into a controlled environment. Due to this, the majority of Minnesota cannabis and hemp is grown indoors or in fully weatherproofed greenhouses, which allow year-round production.
Growing outdoors requires a business cultivator license from the Office of Cannabis Management. After getting a license, make sure to thoroughly prepare the outdoor soil before planting with soil-warming mulches, which protect the new growth from freezing. Check the freeze map for your area to help with scheduling your outdoor crop.
- Generally, soil in Minnesota has good levels of magnesium, calcium, and sulfur, and not enough phosphorus, nitrogen and potassium, which must be added in a fertilizer.
- While growing marijuana outdoors in Minnesota, there is a short growth timeframe of just 3-4 months. Plant the fastest growing strains.
- The fastest growing plants come from autoflowering seeds, mostly of Indica and Hybrid strains, which begin to flower during colder temperatures and shorter days in the fall. The most popular cannabis strains to plant outdoors in MN are: Skywalker OG, White Widow, Kush strains, Zkittlez, Girl Scout Cookies, and Blue Cheese.
Meanwhile growing indoors allows the option to plant any variety of cannabis, regardless of the weather outside, and to grow multiple harvests each year.
As of August 1, 2023, any 21 year-old or older resident of Minnesota, is allowed to grow up to 8 cannabis plants at home. However, only 4 of these plants can be fully grown at a time. According to the law, you must grow them in a secure area, like a closet or room, where they can't be seen from outside.
Grow Cannabis Indoors
A successful cannabis plant requires controlling 9 parameters (5 above ground and 4 in the soil):
ABOVE GROUND (Foliar Environment):
- Light
- Temperature
- Humidity
- Wind
- CO2 (Carbon Dioxide)
BELOW GROUND (Root Environment):
- Root zone temperature
- Nutrients
- Oxygen
- Water
Here are the general guidelines for the needed conditions.
| Germination | Seedling | Vegetative | Flowering | Drying & Curing | |
|---|---|---|---|---|---|
| Temperature | 70°-80°F | 70°-80°F | 70°-80°F | 70°-80°F | 60°-70°F |
| Humidity | 70%-80% | 60%-70% | 50%-70% | 40%-60% | 45%-55% |
| VPD | 0.2-0.8 kPA | 0.6-1.1 kPa | 0.6-1.4 kPa | 0.8-1.8 kPa | |
| Lighting | 13+ hours/day | 13+ hours/day | 13+ hours/day | 12 hours | |
| Duration | 1-2 weeks | 1-2 weeks | >1 week | 2-4 months |
(To get more accurate instructions, follow your breeder’s advice).

To grow a marijuana plant in a home-type environment, you typically need:
- Tent - which is designed for growing plants and is lined with reflective materials
- Grow Lights - to provide energy to the plants
- Programmable Power Controllers - to connect the lights and the heater to the power strip
- Surge Protector - to connect the electrical equipment inside the tent
- Thermostat and Humidistat - to monitor and track the microclimate
- Humidifier and Dehumidifier - allows to bring the humidity levels up or down fast or to maintain certain humidity at a steady level
- Space Heater - to maintain the appropriate temperature for optimal growth
- Oscillating Fan - to move the air around inside the tent
- Ventilation System - to sustain the optimal microclimate in the tent day-and-night
- Seeds - to start the plant
- Growing and gardening supplies, soil nutrients, and testing equipment - to maintain the ideal growing conditions for the plant.
TIP: While most equipment is usually less expensive if purchased online, bulky growing supplies, soil, and additives are typically more affordable at your local garden center.
Here is a detailed look at the types of supplies you could use to grow marijuana in Minnesota:
Growing Setup
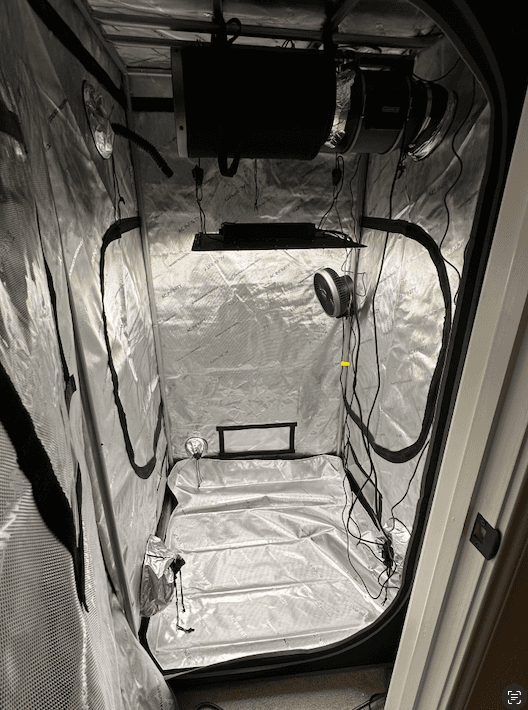
When planning to grow cannabis at home in Minnesota, you need to find a place where you can provide a stable environment for your plants. A grow tent allows you to create and control a microclimate inside a sealed grow space in your home. With ventilation set up properly, you should not hear nor smell the growing operation. The rest of this guide is written based on growing inside of a tent.
Growing Tents
The most common cannabis growing tent sizes are:
- 2 ft. x 4 ft. x 5 ft. (24” x 48” x 60”)
- 3 ft. x 3 ft. x 6-7 ft. (36” x 36” x 72-80”)
- 4 ft. x 4 ft. x 7 ft. (48” x 48” x 84”).
When selecting the size of the tent, make sure that it fits the grow space and accommodates the desired number of plants (In MN: no more than 8, unless you have a cultivator’s license, and only 4 can be flowering at the same time).
One cannabis plant on average produces 6-7 ounces (≈170-200 grams) of ready to consume (dried and cured) bud.
Below are the general guidelines for sizing a tent, along with a few options.
NOTES:
- While the linked kits are listed as “Complete”, every grow-at-home setup is slightly different, and you may require to purchase additional equipment to fit your needs. Make sure that you understand what each piece of equipment does, so you can adjust your setup based on what may be lacking to achieve a desired effect.
- Tent Material: When selecting your tent, pay attention to the thickness of the material. A thicker material should last longer. Thickness of the tent material is listed in Deniers (with quality tents ranging between 600D and 2,000D). The higher number means a thicker material.
PRICING:
- The cannabis grow tent by itself will typically cost $80-$200. If the tent is purchased as a kit, the entire setup typically costs between $300 and $900, depending on the type and size of the equipment.
- When comparing prices, look at both the manufacturer’s websites and the shopping networks like Amazon, especially to compare shipping costs and available temporary discounts, which may vary widely.
Most popular grow tents are made by:
2X2 TENTS
A 2 x 2 tent can accommodate a few plants (1-4), depending on how small you keep them:
2X2 Grow Tents
VIVOSUN S224 2x2 Grow Tent ($80)
- 24 x 24 x 48 inches (4 ft tall)
- Fabric Thickness: 600D
AC Infinity CLOUDLAB 722 ($120-$130)
- 24 x 24 x 72 inches (6 ft tall)
- Fabric Thickness: 2000D
Spider Farmer Pro-Grade 2x2 Grow Tent with Observation Window and Floor Tray ($110)
- 24 x 24 x 72 inches (6 ft tall)
- Fabric Thickness: 1,680D
2x2 Grow Tent Kits
MARS HYDRO 2x2 Grow Tent Kit for New Grower ($300)
- 24 x 24 x 55 inches (4’7” tall)
- Fabric Thickness: 1,6780D
Spider Farmer Grow Tent Complete Kit ($271 - $320)
- 24 x 24 x 55 inches (4’7” tall)
- Fabric Thickness: 1,680D
2X4 TENTS
A 2 x 4 tent can accommodate 2 regular size plants, and up to 8, if pruned or trained:
2X4 Grow Tents
VIVOSUN S425 4x2 Grow Tent ($100)
- 48 x 24 x 60 inches (5 ft tall) - a basic tent with a low ceiling.
- Fabric Thickness: 600D
AC Infinity CLOUDLAB 642 - 4x2 Grow Tent ($140)
- 48 x 24 x 72 inches (6 ft tall) - a thicker material tent, with a taller ceiling.
- Fabric Thickness: 2,000D
2X4 Grow Tent Kits
VIVOSUN GIY 4x2 Grow Tent Complete System ($500)
- 48 x 24 x 60 inches (5 ft tall)
- Fabric Thickness: 600D
Spider Farmer 4x2 Grow Tent Complete Kit ($560)
- 24 x 47 x 71 (≈ 6 ft. tall)
- Fabric Thickness: 1,680D
3X3 TENTS
A 3 x 3 tent can accommodate 3-4 regular size plants, and up to 9, if pruned or trained:
3x3 Grow Tents
Grow Tent 600D 3x3 ($71)
- 36 x 36 x 72 inch (6 ft. tall)
- Fabric Thickness: 600D
AC Infinity CLOUDLAB 733 ($120-$130)
- 36 x 36 x 72 inch (6 ft. tall)
- Fabric Thickness: 2000D
VIVOSUN S336 3x3 Grow Tent ($110-$140)
- 36 x 36 x 72 inch (6 ft. tall)
- Fabric Thickness: 600D
3x3 Grow Tent Kits
VIVOSUN GIY 3x3 Grow Tent Complete System ($460-$560)
- 36 x 36 x 72 inch (6 ft. tall)
- Fabric Thickness: 600D
- 4-inch fans and ducting
AC Infinity Advance Grow System 3x3, WiFi-Integrated Grow Tent Kit ($700)
- 36 x 36 x 72 inch (6 ft. tall)
- Fabric Thickness: 2,000D
- 6-inch fans and ducting
4X4 TENTS
A 4 x 4 tent can accommodate 4 regular size plants, and up to 16, if pruned or trained:
4x4 Grow Tents
Grow Tent 600D 4x4 ($91)
- 48 x 48 x 78 inch (6’6” tall)
- Fabric Thickness: 600D
VIVOSUN S448 4x4 Grow Tent with Window ($130)
- 48 x 48 x 80 inch (6’8” tall)
- Fabric Thickness: 600D
4x4 Grow Tent Kits
VIVOSUN GIY 4x4 Grow Tent Complete System ($560)
- 48 x 48 x 80 inch (6’8” tall)
- Fabric Thickness: 600D
MARS HYDRO 4x4 Smart Grow Tent Kit Complete System ($840)
- 48 x 48 x 80 inch (6’8” tall)
- Fabric Thickness: 1,680D
5X5 TENTS
A 5 x 5 tent can accommodate 4 large size plants, and 25 or more, if pruned or trained:
5x5 Grow Tents
VIVOSUN S558 5x5 Grow Tent ($190-$200)
- 60 x 60 x 80 inch (6’8” tall)
- Fabric Thickness: 600D
AC Infinity CLOUDLAB 866 Advance Grow Tent ($200)
- 60 x 60 x 80 inch (6’8” tall)
- Fabric Thickness: 2,000D
5x5 Grow Tent Kits
TopoGrow 5'x5' Grow Tent Complete Kit Package ($551)
- 60 x 60 x 80 inch (6’8” tall)
- Fabric Thickness: 600D
Hydro Plus Grow Tent Complete Kit 5x5 ($567)
- 60 x 60 x 78 inch (6’6” tall)
- Fabric Thickness: 600D
Large-Format Tents
If you plan on growing a crop of over 20 plants, you may need a larger tent, and cultivator license. Here are a few examples:
VIVOSUN S848 4x8 Grow Tent ($175-$210)
- 48 x 96 x 80 inches (4’ x 8’ x 6’8” tall)
- Fabric Thickness: 600D
VIVOSUN S888 8x8 Grow Tent - ($279 - $350)
- 96 x 96 x 80 inches (8’ x 8’ x 6’8” tall)
- Fabric Thickness: 600D
Smart Controller for Grow Tent
With the development of smart technology, several tent manufacturers offer smart controllers, which can be added to the tent, to provide automation for fans, humidifiers, lights, and smart outlets.
The smart controller by itself will cost anywhere from $60 to $130, based on:
- Number of devices it supports (typically 4-8),
- Number of possible settings and smart triggers, which can be configured,
- Availability of a phone app to track the device
- Type of connection: Bluetooth, WiFi, or Both
Here are a few examples:
VIVOSUN GrowHub Controller E42A ($90)
- Supports up to 4 devices
- Program your equipment to automatically take you through each stage of growth – program light intensity, light spectrum, VPD, on/off periods, fan speed, and airflow volume.
AC INFINITY CONTROLLER 69 PRO ($100)
- Supports up to 4 devices
- Automates devices to dynamically change speed and brightness levels in response to temperature, humidity, and VPD
- Connects through Bluetooth or WiFi
AC INFINITY CONTROLLER 69 PRO+ ($120-129)
- For around $30 more, a Pro Plus version adds support for 4 more devices, for a total of 8.
Cannabis Indoor Growing Equipment - a Detailed Look
Indoor cannabis cultivation is highly energy-intensive and requires careful planning. While shopping for equipment and supplies, pay attention to both the price and power efficiency.
Here is a general guide of what you would need to keep your Minnesota marijuana crop growing, along with estimated associated costs:
Cannabis Grow Lights
Grow lights are extremely important because light provides energy to the plants. The plant uses photosynthesis to stimulate the sugar production, which causes the plant to grow. The more light the plant gets, the more sugar it makes, and the more it grows. During the light hours the plant creates and stores the energy, and at night it consumes it. When marijuana plants have a balance of nutrients and the correct cultivation environment - light is the key to unlocking the full potential of the plant.
Light Schedule - General Guidance
- Germination process for the seeds requires darkness (inside the grow medium)
- Seedling: Once the seed sprouts and a seedling appears above the soil, the light is usually kept on for a few days, at all times at 10%-20% brightness. The plant is collecting the initial burst of energy.
- During the vegetative phase, the lights are typically kept for 13-18 hrs ON, 6-11 hrs OFF, stimulating the growth of the plant and the leaves.
- Flowering plants are typically lit for 12-hrs ON and 12-hrs OFF, mimicking the shorter days of the fall. The plant has more time during the night to consume the carbohydrates, which are used during the next 12-hr light cycle to produce buds.
The useful spectrum of light wavelength for cannabis photosynthesis is between 350 and 750 nanometers, where 400 to 700 is visible light, 350-400 is UV Light, and 700-750 is Infra-Red. Example of use: Blue light can keep the plant shorter during the vegetative stage, while a brighter light is better during flowering, when an explosive development of bud is desired.
Aim to get the best light you can afford because it can always be turned down or raised, but you can’t crank up a cheap light above it’s maximum capability. (SAFETY NOTE: Make sure to get a pair of sunglasses to protect your eyes from the bright lights)
You can manipulate the light settings throughout the growth of the plant, to speed up or slow down the growth and the budding, and to increase the yield of the final product.
More Light = More Yield
When choosing the light to grow cannabis, check Two Key numbers (if both are available in the specifications):
- Consumption: How much maximum power the light draws from the outlet (Input Wattage)
- Light Output: How much maximum light output it can provide to the plant
Light Output Measurement
Light intensity is measured through photosynthetic photon flux density (PPFD). PPFD is measured in micromoles of light per square meter per second (µmol/m2/s) - indicating a rate of light coming down on the surface below it. When the light is raised, the amount of light reaching the service is decreased. Because of this the efficiency of grow lights is measured at varying heights (between 12” and 24”).
Cannabis grows best under lights capable of delivering 1500-1600 micromoles (PPFD), with noticeable increase in yield between 1800 and 2000 PPFD. The majority of home-grow lights are between 800 and 1700 PPFD
To calculate the amount of light that the surface receives from the light source over the course of the period while it is ON, PPFD of the light source must be converted to Daily Light Integral (DLI). DLI is expressed in Moles per Square Meter per Day. (Learn more about the in-depth details of cannabis lighting).
To measure the light’s PPFD output, use a phone app (Examples: Android, iOS), or for more precise measurement, purchase a Full-Spectrum Quantum Meter, which can be either a handheld unit or a USB sensor:
Handheld Full-Spectrum Quantum Meter
Full-Spectrum Smart Quantum Sensor (USB)
LED Grow Light
LED grow lights are the most common type of lights for tent-growing. Cannabis needs a lot of light and LED lights allow you to get a lot of light output while consuming less electricity and not affecting the temperature too much.
VIVOSUN VS1000 LED Grow Light with Samsung LM301 Diodes & Sosen Driver ($110-$130)
- Light Coverage: 1 x 1 ft.
- Power Consumption: up to 100 Watts
- PPFD: 1081 at 12”, 865 at 16”, 640 at 18”
- Dimmable
AC Infinity IONGRID T22, LED Grow Light with Samsung LM301H Diodes ($179)
- Light Coverage: 2 x 2 feet
- Power Consumption: up to 150W
- PPFD: 1253 at 12”
- 10 Light Settings
AC Infinity IONBOARD S33, LED Grow Light Board with Samsung LM301B Diodes ($269)
- Light Coverage: 3 x 3 feet
- Power Consumption: up to 240W
- PPFD: 1702 at 12”
- 10 Light Settings
AC Infinity IONGRID T24, LED Grow Light with Samsung LM301H Diodes ($359)
- Light Coverage: 2 x 4 feet (2 2x2 lights)
- Power Consumption: up to 260W
- PPFD: 1728 at 12”
- Digital transition controller
RDJ Bouns 400W LED Grow Light for 3X3 Coverage Grow Tent ($290)
- Light Coverage: 3 x 3 feet
- Voltage: 56 Volts
- Power Consumption: up to 400W
- PPFD: 1220 at 12”, 865 at 18”, 608 at 24”
- Color: 3,000 Kelvin
- Brightness (Luminous Flux): 68,000 Lumen
RDJ Bouns 720W LED Grow Light for 4x4 Grow Tent ($340)
- Light Coverage: 4 x 4 feet
- Voltage: 56 Volts
- Power Consumption: up to 800W
- PPFD: 1476 at 12”, 1190 at 18”, 916 at 24”
RDJ Bouns 1000W LED Grow Light for 5x5 Grow Tent ($650)
- Light Coverage: 5 x 5 feet
- Voltage: 56 Volts
- Power Consumption: 1000W
- PPFD: 1949 at 12”, 1548 at 18”, 1218 at 24”
Strobe Grow Lights
Xenon strobe growing lights are a new alternative to the now-standard LED lights:
- FireFly-One Pulsed Xenon Grow Lights (new product coming to the market)
Grow Room Shielding Sunglasses
While working in the grow room, you are exposed to bright LED lights. Protect your eyes with a pair of protective grow room glasses:
GREEN - VIVOSUN Indoor Hydroponics Grow Room Glasses - $16
- Blocks: UVA & UVB rays
BLUE - VIVOSUN Indoor Hydroponics Grow Room Glasses - $16
- Blocks: UVA & UVB rays
Apollo Horticulture Grow Light Glasses Goggles for Wear Fit Over Glasses - $15
- Blocks: UVA & UVB rays
- Fits over glasses
Programmable Power Controller (x2)
Power controllers allow you to set up a schedule when the plugged-in device receives power. Since both lights and heaters can consume a lot of electricity, a simple power controller allows the grower to use the same power strip for multiple power hungry devices, alternating when each one gets to receive the power:
- Example: Lights can be set to run from 6:05 a.m. to 5:55 p.m., while the Heater is running from 6 p.m. to 6 a.m.
If you plan to use the same power strip for both the lights and the heater, you need either 1 controller with 2 independently programmable outlets or 2 single-outlet controllers:
BN-LINK 7 Day Heavy Duty Digital Programmable Timer ($10-$15 / each, $20-$25 for a 2-pack)
- Maximum rating: 1,724W
- Supports 2 devices - (great if you have 2 lights that need to be on at the same time)
[2 Pack] NEARPOW Digital Timer For Lamp With Dual Outlets
- Maximum Rating: 1,800W
- Each outlet is programmed independently
- 10 On/Off Programs
- 24-Hour And 7-Day
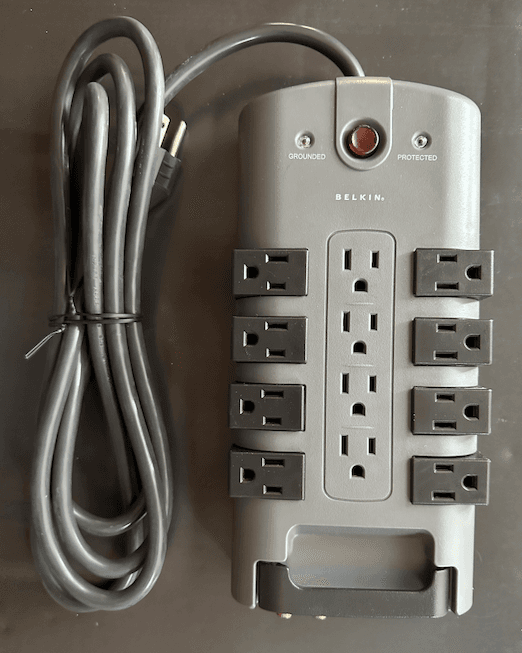
Surge Protector - Power Strip (15 Amp)
A power strip running from a standard household 15 Amp outlet can be used for both LED Lights and the Space Heater.
If you run both of these high power devices simultaneously on the same outlet - you could go over the maximum available voltage in the circuit and pop a breaker. To avoid tripping a breaker while using the same power strip, it is best to run the devices on opposite time schedules (using the “Programmable Power Controllers”).
When selecting a surge protector, it must have enough connections to meet your needs and be rated to at least 1,800 watts. 1,800 watts is the maximum capacity of a 15 Amp circuit (120 volt x 15 amp = 1,800 watts).
The power strips shown below all exceed the rating you need for a standard residential outlet:
- Power Strip Surge Protector with 3 Widely Spaced Outlets and 2 USB Ports, 1875W/15A ($10-$15)
- Power Strip, Nuetsa Surge Protector with 12 Outlets and 4 USB Ports ($17-$22)
- 18 Outlets Surge Protector Power Strip ($20)
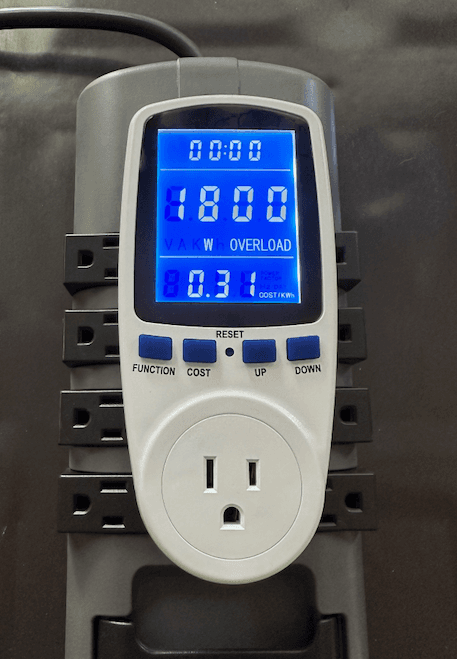
Smart Electricity Usage for Cannabis Growing
To avoid a power overload and the possibility of the whole tent shutting down and possibly ruining the crop, consider adding some smart features to your setup:
Power Consumption Monitoring gives an opportunity to see how much power the outlet is using. It can show the current load and the lowest and the highest load - to identify the most power demanding times of the day and to give an idea of how much output this outlet can handle. Additionally, by inputting the current local electricity prices, you can track the electricity usage costs for each outlet or device:
Power Failure Monitor provides additional security in knowing that the outlet is working properly and that all of the equipment is powered on as-needed. In case if the power goes out, either a siren goes off or a smart sensor starts sending text messages and emails to notify of the problem:
Power Failure Alarm Automatic Power Cut Failure Alerter 120db LED Indicator - $8
Sounds the 120 dBA alarm when the power fails.
Yolink Smart Power Fail Alarm - $32-40
Sends notification when power fails via the App, Text/SMS, Email, and an optional Sound Alarm.
Thermostat, Humidistat, Hygrometer, CO2 Monitor / Controller
Maintaining the precise levels of humidity and temperature inside the grow tent is crucial for the plants. While the recommended temperatures and humidity levels may differ based on the stage of the plant’s growth, the average across the growth lifecycle is 77 degrees, at 50% humidity.
Temperature should be kept as high as 86 degrees Fahrenheit during the early life of the plant, and tapered off to as low as 68 degrees during the pre-harvest. Make sure to follow the seed manufacturer’s growing guidelines.
Cannabis Temperature FACT: Flower buds of the cannabis plant are always hotter than the ambient air in the grow room. Buds can be 3 to 10 degrees hotter, depending on the level of CO2 in the air. More CO2 mixed with water leads to more carbohydrates (sugars) in the plants, which speeds up the growth and the temperature of the bud.
To make sure that the microclimate is exactly how you want it, monitor it using a thermometer and a humidity monitor or controller:
- Monitors can notify you about the conditions inside your tent. If you get a Wi-Fi or a Bluetooth sensor - you can check the readings remotely, using an app. The app can trigger a connected smart outlet to turn ON or OFF.
- Controllers have built-in outlets, which can automate and turn ON and OFF the devices that affect the readings. If it’s too cold, the sensor can power on a heater. If the humidity is too high, a dehumidifier gets turned on.
NOTE: To get accurate readings, suspend the sensor probes in the middle of the tent’s roof:
Battery Powered - Smart Monitors
- No Hub Required
- App Alerts
- Hub Included
- Includes: 2 Temperature / Humidity Sensors
- App Alerts
- Text /SMS Alerts
- Compatible with Alexa
Thermostat and Humidistat Controller (with built-in outlets)
Pymeter Humidistat Temperature Humidity Controller ($30)
Inkbird Temperature and Humidity Controller ($70)
CO2 levels in the grow room should be maintained between 1000 and 1500 ppm, with higher numbers during the flowering stage. To raise the level use the CO2 Booster, to lower - increase the ventilation. (Follow the seed bank’s instructions).
CO2 Air Quality Monitor
Indoor CO2 Detector + Temp + Humidity, Air Quality Monitor
CO2 Booster
CO2 for Indoor Grow Tent - Ready to Use
CO2 BAG -CO2 for indoor growing
Humidity
Relative Humidity (RH) in the cannabis growing tent may vary between 30% and 70%, depending on the stage of growth:
- During the seedling stage the humidity levels are highest, closer to 70%.
- During the vegetative stage humidity is lowered by 3%-5% every week, to not lower than 40%.
- During the flowering period humidity should be below 60%, ideally in the range of 40%-50%.
- A couple of weeks before the harvest, humidity should be lowered as much as possible, to as low as 30%.
If humidity cannot be controlled using ventilation, minimizing overwatering, and removing condensation - a humidifier and a dehumidifier can help, especially during the flowering and pre-harvesting stages.
Humidifier
Most homes with central air keep the humidity levels between 30% and 50%, which is too low for growing cannabis using this dry air. Introduce the humidity to the tent using a humidifier which can be connected to smart controls, to maintain the precise level of humidity in the tent. A humidifier made for the growing in the tent will power on and off, on demand, based on your settings. Examples:
- AC Infinity - CloudForge T3 - this humidifier can be placed outside the tent, pushing the vapor into the tent via a hose.
Dehumidifier
If you have too much humidity, then you may need a dehumidifier. A dehumidifier can be handy during the drying process (post-harvest). To simplify your life, get a dehumidifier with a built-in Hygrometer.
NOTE: Those residing in very humid area, can invest in a dehumidifier with a large enough reservoir, so it can keep up with removing all the extra moisture from the air:
- Ivation Dehumidifier - $30
- Water Tank Size: 17 oz.
- VIVOSUN Small Space Mini Dehumidifier - $55
- Water Tank Size: 13.5 oz.
- Gocheer Dehumidifier - $90-$100
- Tank Size: 68 oz.
- NineSky Dehumidifier with Auto Shut Off - $90 - $110
- Water Tank Size: 85 oz.
Space Heater
The ideal average temperature for growing cannabis indoors, inside a tent is 77 degrees (with variables between 60 and 80) and a space heater provides a way to control it. Using the alternating power schedule, which was described in the Programmable Power Controller section, the space heater is typically running during the night, because the night is usually colder than the day’s ambient temperature. With a space heater, you can tune to the needed temperature, to account for the lack of heat coming from the lights, which are off at night.
If you are cultivating cannabis during the winter in Minnesota, you will likely need to run the heater during both night and daytime. In this case, you may need a second outlet to support both the heater and the light at the same time.
Instructions for using the heater: Dial the space heater in by using the thermometer that is hanging from the middle of the tent, by slightly adjusting the dial and walking away for a bit, allowing for the temperature to stabilize. Come back and adjust. Repeat as necessary until the desired temperature is reached:
Amazon Basics Indoor Portable Radiator Heater - $72 (the easiest one to dial in)
- Maximum Power Consumption: 1500 Watts
Tangkula Oil Filled Radiator Heater - $80
- Maximum Power Consumption: 700 Watts
Oscillating Fan
A fan that swings side to side is called an oscillating fan. When used in a plant growing tent, it has several benefits:
- Air Circulation - aids in regulating temperature and humidity.
- Increased Plant Strength - a gentle, consistent breeze strengthens plant stems, enabling them to support heavier buds during flowering.
- Pest Control - continuous air movement reduces the chance of pests that thrive in stagnant air.
An oscillating fan’s airflow (counted in Cubic Feet per Minute (CFM) needs to match or exceed the volume of air inside the tent. To calculate the volume of the tent: Multiply the Width by Length and by Height.
- Example: 3’ x 3’ x 7’ tent needs a fan capable of handling at least 63 CFM
The oscillating fan needs to be installed mid-height inside the tent. It can be either on a floor stand or mounted to one of the tent poles. Fans with floor stands are typically larger than the clip-on ones and take much more space. Instead of one large fan, it is possible to install two clip-on fans on the opposite sides of the tent.
When selecting the fans, pay attention to their noise level, the airflow, the power consumption, and the size. A 6 inch fan is usually enough for tents up to 4’ x 4’. A 9-inch fan is better suited for tents between 5’ x 5’ to 10’ x 10’.
Here are a few examples:
CLIP-ON FANS
VIVOSUN AeroWave E6 Grow Tent Fan with App Control - $36-$38
- Noise: 33 dBA
- Power Consumption: 20 W
- Size: 6 inch
AC Infinity CLOUDRAY S6 - $50
- Noise: 33 dBA
- Airflow: 315 CFM
- Power Consumption: 12 W
- Size: 6 inch
AC Infinity CLOUDRAY A9 - $70
- Noise: 36dBA
- Airflow: 450 CFM
- Power Consumption: 8W
- Size: 9 inch
An oscillating fan works in concert with the rest of the ventilation system.
Growing Ventilation System
In an indoor grow room, a ventilation system is crucial for promoting healthy plant growth. It replaces stale air with fresh air, which is vital for photosynthesis. Proper ventilation not only ensures optimal temperature, humidity, and carbon dioxide levels, but also prevents diseases and pests, ensuring the health of plant growth.
Fresh air enters the grow tent through the intake and escapes it through the exhaust. As the flowering stage concludes, maintaining maximum airflow is essential to prevent mold. Using carbon filters in the exhaust and incorporating oscillating fans further optimizes the environment for healthy plants.
The basic ventilation for indoor cultivation typically includes:
- Intake of fresh air from outside the tent
- Fan moving the air inside the tent
- Exhaust fan to remove the old air from the tent and move it outside
- Filter that cleans the air before it leaves the tent through the exhaust
When growing cannabis indoors, controlling the smell is vital. Unlike other plants, cannabis has a strong aroma that can disturb neighbors or draw unwanted attention. To effectively manage the smell, always pair the extraction fan with a carbon filter. This ensures that all outgoing air is filtered continuously.
The key to growing smell-free cannabis indoors is to maintain Negative Pressure in the tent, which means that more air is being sucked out of it through the exhaust than is able to enter through the vents and intakes.
- If the tent looks puffed up, that means it has positive pressure and you need to increase the volume of the exhaust. Otherwise the air and the smells from the tent leak back out into the house unfiltered.
- If the tent walls are slightly bending inwards - this means that your Negative Pressure ventilation system is working properly.
- If using a fan on both the intake and the exhaust, maintain the negative pressure by installing a stronger fan (with a higher CFM rating) on the exhaust side and a weaker one as the intake (more on that below).
Grow tent ventilation may require 1 or 2 inline fans. Fans in grow tents come typically in a 4 or 6 inch size. 6-inch ventilation is the most common for 3x3 tents or larger, while the 4-inch setup is used in 2x2 tents.
Passive vs. Active Intake
PASSIVE INTAKE: If a tent is placed in a large indoor grow space with plenty of room-temperature air, you may be able to use just 1 inline fan for exhaust (air extractor fan). In this case the air is vented out of the top of the tent, creating vacuum in the tent and bringing in air from the surrounding room through the side vents.
ACTIVE INTAKE: If the tent is placed in a confined space, without plenty of fresh air surrounding it, or if the tent is large and requires a large volume of air circulation, add an intake with a second fan at the bottom of the tent, which forces the air from the next room or outdoors into the tent. The intake should be rated at the same CFM as the exhaust, which ensures an even distribution of fresh air.
Inline Duct Fan
Basic Inline Fan CFM Calculations:
The inline fan must match (or exceed) its airflow (measured in Cubic Feet Per Minute (CFM) to the volume of the tent. Calculate the cubic size of the tent. Convert the inside dimensions to feet, then multiply Length by Width, and by Height. Without adding anything else to the system, your fan should meet or exceed the cubic size of the tent. Example: 48”x48”x80” tent is 4’x4’x6.67’ = 106.72 cu.ft. A minimal fan for this volume is at least 107 CFM.
Additional Inline Fan CFM Considerations:
Each accessory, such as filters, ducting, and turns that gets added to the exhaust system restricts airflow and requires an increase in the CFM of the fan. Each additional item added to the air line can require 20-60% of additional air. Most non-commercial grow tents use at least two accessories: Carbon Filter and Ducting. To get the final needed CFM; multiply the tent’s volume in cubic feet by the efficiency percentage of each accessory. If you do not have that information, and to stay on the safe side, you can multiply the volume by the number of accessories. Using the previous tent example with a volume of 107 CFM, with 2 accessories you need an inline fan with 214 CFM (107 x 2). If you decide to add an elbow or a silencer, now your fan needs to be 321 CFM or larger.
Inline Fan Noise:
The exhaust fan is the loudest part of the growing tent process, so a quiet fan is typically best. The basic cheaper inline fans can be as loud as 70 dBA, which is an equivalent of a sound a running washing machine makes, or 50 dBA (with a noise level equivalent of an electric toothbrush). If noise level is important, for a few more dollars you can get a 32-34 dBA fan, working at the noise level of a whisper nearby.
TerraBloom 6 Inch Inline Fan - $79
- Air Flow: 395 CFM
- Noise: 70 dB
- Built-in Speed Controller
VIVOSUN T6 6 Inch - $79
- Air Flow: 390 CFM
- Noise: 34 dB
- Speed: 2,250 RPM
AC Infinity Cloudnine PRO S6 - 6” Basic Quiet Fan - $120
- Air Flow: 402 CFM
- Noise: 32 dB
- WiFi
- Mobile App Control with 10-Level Fan Speeds
AC Infinity Cloudnine PRO T6 - 6” Quiet Fan with Temp and Humidity Sensors - $160 (Upgrade from the basic quietest fan Cloudnine Pro S6)
- Air Flow: 402 CFM
- Noise: 32 dB
- WiFi
- Mobile App Control with Temperature and Humid Dynamic Trigger and Timers.
Noise Reduction Duct Couplers
To further reduce the noise of the running inline exhaust fan, get noise reduction duct couplers, to add to all HVAC connections:
- POWERTEC 70281 Dust Control Flex Cuff with Steel Clamps, 6-Inch - $15
- AC Infinity Noise Reduction Clamp 6-Inch - $15
Ventilation Ducting and Clamps
Ducting allows the air to run in and out of the tent, based on the location of the intake and exhaust. Ducting is typically done through the:
- Roof
- Ceiling, or
- Window
If the ducting is purchased at a hardware store, it typically comes in 25-foot sections.
Match the diameter of the duct to the size of the exhaust system, based on the size and CFM needed for the tent (typically: 4, 6, 8, or 10 inch). If the exhaust duct is long and has multiple turns, you may need to get a stronger inline exhaust fan, which will have enough power to push the air out. If the tent is puffed up and shows signs of Positive Pressure, this is a sure sign that the exhaust fan and/or the duct size is not keeping up with the job and should be upgraded:
4 Inch Duct
- AC Infinity Flexible 4-Inch Aluminum Ducting (2 clams included) - $20
- EesTeck 4" (Diameter) Adjustable 304 Stainless Steel Duct Clamps (4 pack) - $8-$9
6 Inch Duct
- VIVOSUN 6 Inch 25 Feet Black Non-Insulated Flex Air Aluminum Ducting - $27
- MIAHART 6 inch Hose Clamp Adjustable 304 Stainless Steel Duct Clamps (6 pack) - $9
8 Inch Duct
- AC Infinity Flexible 8-Inch Aluminum Ducting (2 clamps included) - $37
- AC Infinity Stainless Steel Duct Clamps, 8-Inch (Pack of 2) - $9
10 Inch Duct
- TerraBloom 10-Inch Dryer Vent Hose 25 Feet (2 clamps included) - $43
- EesTeck 10" (Diameter) Adjustable 304 Stainless Steel Duct Clamps (Pack of 2) - $7
Window Duct Kit
Lowes
Home Depot
- 6 in. I.D. x 25 ft. Air Ventilator Heavy-Duty Flexible Ventilation Hose ($80 - 8” 25 ft duct hose)
Carbon Air Filter
Activated carbon air filters get installed on the cannabis grow tent’s exhaust system to control the smell. If a filter is not used, a strong odor of cannabis will be noticeable near the location of the exhaust. (NOTE: Expect to replace the carbon filter after 12-24 months of use. Cold and more humid environments shorten the usable period of use):
4 Inch Filter
- VIVOSUN 4 Inch Air Carbon Filter - $39-$43
- AC Infinity Air Carbon Filter 4" - $50
6 inch Filter
- VIVOSUN 6 Inch Air Carbon Filter - $66 - $73
- AC Infinity Air Carbon Filter 6" - $70
8 Inch Filter
- VIVOSUN 8 Inch Air Carbon Filter - $72-$90
- AC Infinity Air Carbon Filter 8" - $90
10 Inch Filter
12 Inch Filter
Ventilation System - Full Kit
Here are a few examples of ventilation kits for growing tents. When looking at them, make sure to check the specifications of all of the included parts. As you can see below, each kit differs based on power consumption, noise level, and features (such as being able to control the vents through an App):
4 Inch Ventilation Kits
VIVOSUN 4 Inch - $117 - $155
Inline Fan Airflow: 190 CFM
Noise: 30 dBa
Ducting - 8 Feet
Carbon Filter
Wattage: 59 W
AC Infinity Air Filtration PRO Kit 4” - $200
- Inline Fan Airflow - 205 CFM
- Noise: 29dBA
- Ducting - 25 Feet
- Carbon Filter
- App control
- Wattage: 18 W
6 Inch Ventilation Kits
VIVOSUN Air Filtration Kit, 6 Inch - $180
- Inline Fan Airflow: 390 CFM
- Noise: 50 dBa
- Ducting - 8 Feet
- Carbon Filter
AC Infinity Air Filtration Kit, 6-Inch, 35 Watt - $179
- Inline Fan Airflow - 352 CFM
- Noise: 34dBA
- Ducting - 25 Feet
- Carbon Filter
- App control
- Wattage: 35 W
8 Inch Ventilation Kits
VIVOSUN Ventilation Kit 8 Inch - $198-220
- Inline Fan Airflow - 720 CFM
- Noise: 38dBA
- Ducting - 25 Feet
- Carbon Filter
- App control
AC Infinity Air Filtration Kit 8” - $250
- Inline Fan Airflow - 724 CFM
- Noise: 42dBA
- Ducting - 25 Feet
- Carbon Filter
- App control
- Power: 72 W
Planting and Cultivating Cannabis
Here is the summary of the cannabis growing process at home:
After the tent is set up with Lights, Oscillating Fans, and Ventilation, planting can begin. Planting seeds is typically done in fabric pots or 3-5 gallon plastic pots, filled with potting mix.
Seed Types: Choose between regular (photoperiod) or autoflower seeds.
- Regular seeds change growth based on light exposure, so you can control the size of the plants based on how much light is given to it.
- Autoflower seeds automatically flower after about a month of growth and are best for fast growing (under 3 months total). Autoflower plants typically create smaller buds than the photoperiods.
Since male cannabis plants do not produce cannabinoids, try to avoid planting them, unless you are trying to stock up on seeds. Buy feminized seeds when possible, to guarantee female plants. If you discover male plants in your crop, get rid of them right away, or they can affect the cannabinoid development in the female plants.
NOTE: If planting non-feminized seeds, plan for at least half of the plants to turn out to be male
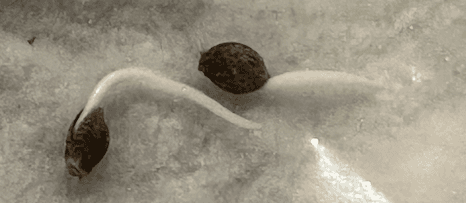
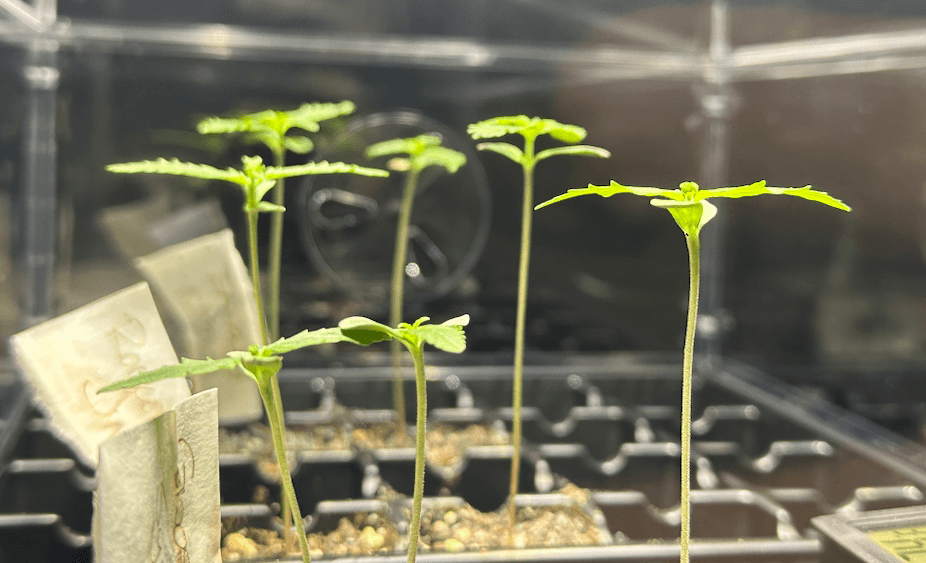
Starting Out: To germinate seeds, place them in the soil and soak in water to begin germination. In a few days to a week you will see small seedlings with two round leaves peeking out of the ground. This is the start of your plant.
After a week, feed the plant fertilizer rich in nitrogen for stem and leaf growth.
Control the size of the plant based on the available volume and space:
- Keep regular cannabis plants in the vegetative stage with more than 12 hours of light daily and they'll keep growing. If the lights are on 24 hours a day, the plant will keep growing.
- Reduce light to 12 hours daily when plants are half-grown to start the flowering stage. This makes the plant focus on developing flowers instead of growth.
- Switch fertilizer to one high in phosphorus for bigger buds.
Harvesting and drying: Look for trichomes on the flowers (they look like tiny white/clear mushrooms). Harvest when they're cloudy or turn amber in color for peak cannabinoid content. Cut the plant down when ready, hang it upside down, and let it dry in the tent for a week, at as close to 30 percent humidity as possible. Once the nuggs at the bottom of the plant start breaking off the main stem - it is time to take them down for final trimming and curing.
After trimming, store the cannabis in containers for curing - to develop the desirable terpenes and to get rid of the undesirable chemicals. Once or twice a day refresh the air in the container - to clear out the escaping chlorophyll and the extra moisture that is coming to the surface from deep within the plant. This is called “burping” the can.
Below is a look at the supplies needed for growing cannabis:
NOTE: When shopping for growing supplies, check your local gardening stores, because buying bulky items, like bags of soil online is typically more expensive than in a local gardening center.
Seed Breeders
The Agriculture Improvement Act of 2018 (Farm Bill) removed hemp seeds from the Drug Enforcement Administration’s (DEA) schedule of controlled substances. As a result, seeds with less than 0.3 percent CBD and THC are considered hemp and can be shipped, including via the U.S. Postal Service. Similarly, you can import hemp seeds.
NOTE: Shipping clones of actual hemp or cannabis plants is illegal.
There are thousands of varieties of cannabis seeds. When selecting the variety for growing, consider what you are trying to achieve with it:
- What kind of medicinal property you are trying to achieve
- What kind of high do you want from your bud
- How much space do you have in the grow room
- How easy is the strain to grow (autoflower is best for novice growers)
- Do you plan to breed (use male seeds) or only harvest (use feminized seeds)
- How long is the growth time of the strain
- What is the average height of the plant
- What is the typical crop yield per square foot
Cannabis seeds are sold by their dominant strains:
- Sativa - a tall, thin plant, with a long flowering phase, and typically higher yields. Sativa plants high is usually described as energizing and uplifting, frequently recommended for the treatment of depression.
- Indica - a shorter plant, which matures faster and has a higher density of flowers. Indica strains are typically associated with relaxation and medical marijuana patients use for pain relief.
- Hybrid - cannabis strains combining Sativa and Indica traits in various quantities. Hybrids can be bred for size, yield output, and for targeted medicinal properties.
Good cannabis seeds are usually dark brown, with stripes or mottling, and hard to the touch.
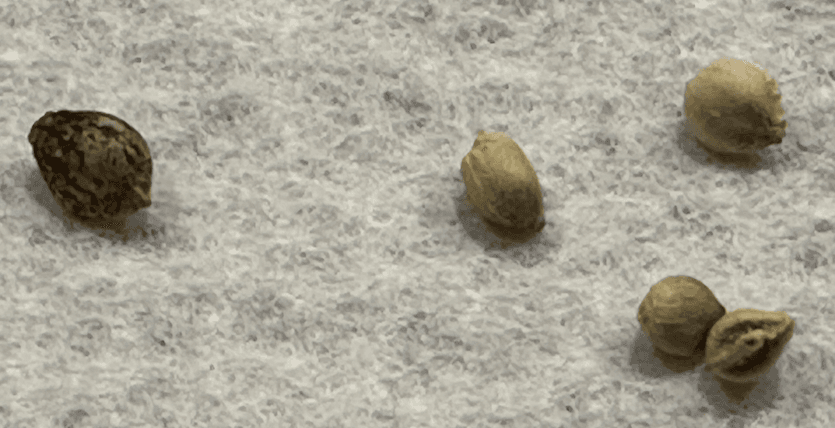
Buy seeds only from reputable sellers who can guarantee the quality and the outcome of the crop, and follow the seller’s growing directions. Here are several suppliers that are known in the industry for high quality cannabis seeds:
- Brothers Grimm
- Cipher Genetics
- Compound Genetics
- Green Nectar Cultivation (based in Minnesota)
- Phylos
- Royal Queen Seeds
- Seeds Here Now
- TreeStar
Planting Containers
Growing cannabis indoors is typically done in fabric soil containers or in 3 or 5 gallon plastic growing pots. The germination process container can differ depending on the quality of the seeds and the availability of equipment.
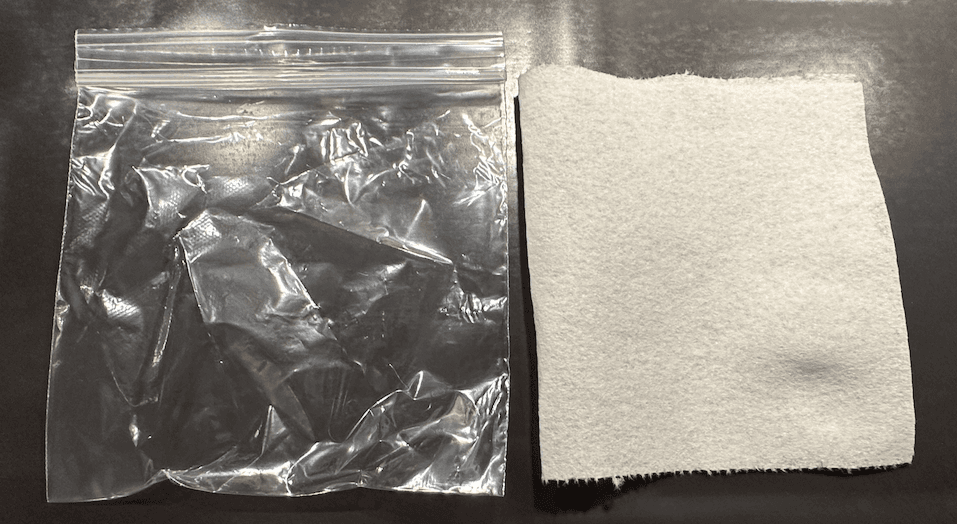
Germination of the seed can be done in 3 typical ways:
- Use a wet paper towel in a ziploc bag, where after the seed sprouts, it is transformed to the growing container or a seedling dome. This is usually done to test if the seed is viable, before planting it into the soil.
- Using small containers, pots, and seedling domes, which require transplantation into larger “growing” pots once the seedling is established. This option saves money on the electricity during the early life of the plant, since it does not involve the growing tent and the high powered lights and fans in it.
- Alternatively, seeds can be germinated in the same container where the plants will grow to adulthood.
Here are some ideas for potting containers:
Ziplock Germination
Place the seed in a ziplock bag under a wet paper towel and leave in a dark space.
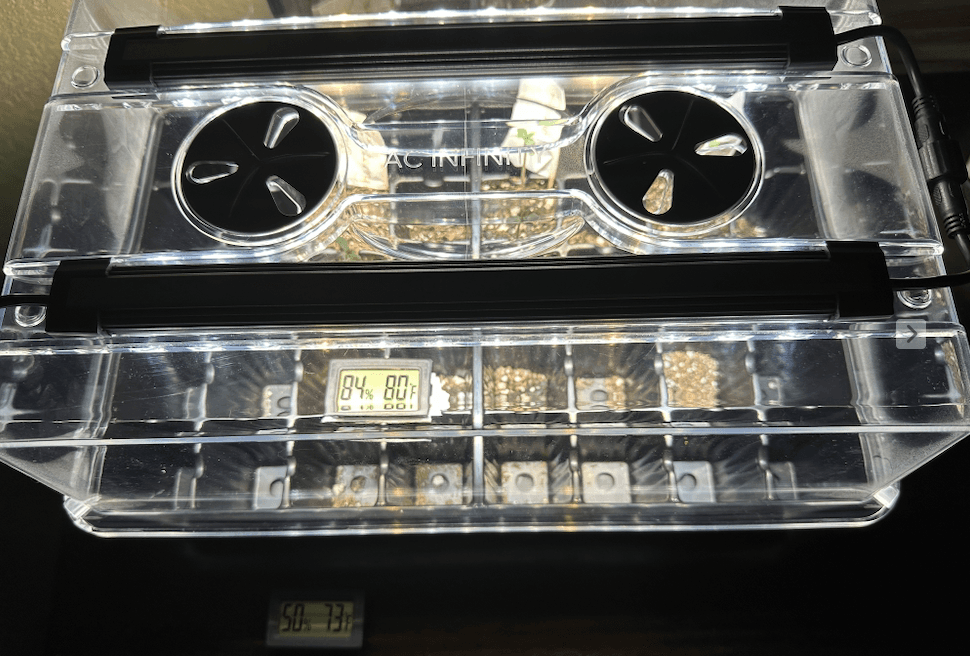
Seedling Starter
If the seeds are questionable and to save on electricity during the first 1-2 weeks, start germination in smaller pods, which allow you to see which one takes and which one doesn’t, before transplanting into a large container:
- Bonviee Seed Starter Tray Seedling Starter Kit (5-pack) - 12 cells per tray
- AC Infinity Humidity Dome, Germination Kit
Plastic Pots
Plastic planting containers are cheap, lightweight, flexible, and shatter resistant. Having drainage holes only at the bottom of the pot allows for higher retention of moisture. Plastic pots are typically watered from the top and can lead to bug infestations in the soil, if left too wet:
3 Gallon Pots
- 3 Gallon Nursery Plastic Planters (6-pack) - $39
5 Gallon Pots
- 5 Gallon Nursery Plastic Planters (6-pack) - $50
Fabric Plant Grow Bags
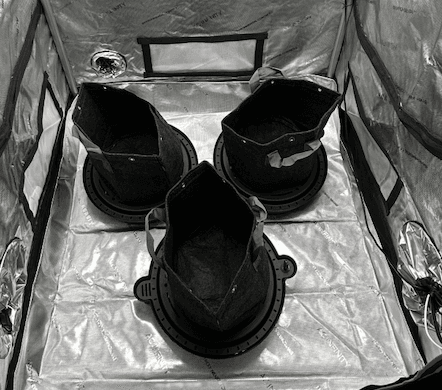
Unlike the plastic grow pots, which have drain holes on the bottom, fabric grow bags are porous throughout the surface and because of this allow for better drainage and air circulation. Fabric grow bags are great for using with self-watering systems, allowing the flexibility to step away from the garden for a few days without ruining the crop.
3 Gallon
VIVOSUN 3 Gallon Plant Grow Bags (5-Pack) - $15-$18
- Fabric Thickness: 300G
AC Infinity 3 Gallon Heavy Duty Fabric Pots (5-Pack) - $20
- Fabric Thickness: 500G
5 Gallon
VIVOSUN 5-Pack 5 Gallon Grow Bags - $17-$21
- Fabric Thickness: 300G
AC Infinity 5 Gallon Heavy Duty Fabric Pots (5-Pack) - $22
- Fabric Thickness: 500G
Self-Watering Systems
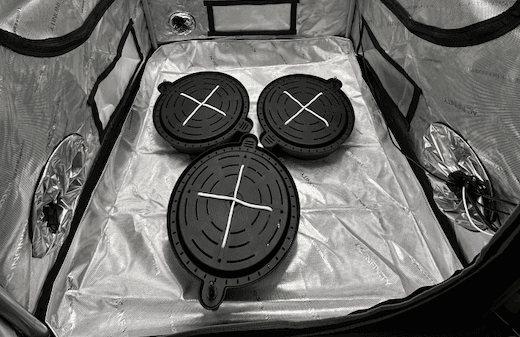
Watering the plant from the top saturates the soil and frequently leads to the development of gnats. If the top of the soil stays dry, the risk of mold and bugs drastically goes down. The watering process can be simplified by placing the fabric pots on self-watering bases, which use ropes like wicks, pulling the water into the bottom of the bag and the root system and keeping the top of the soil dry and bug-free. The gauge on the side of the pot base shows the level of the water inside:
AC Infinity Self-Watering Fabric Pot Base
Drip Trays
Find a drip tray based on the size and shape of the surface that the plant containers will cover. Here are a few examples:
- 10 Inch Plant Saucer Drip Trays (6-pack)
- 12 Inch Plant Saucer Drip Trays (6-pack)
- Plant Growing Trays No Drain Holes 1’ x 2’
- Premium Quality Seedling Trays 15 inch x 9 inch
Growing Medium (Soil)
In cannabis cultivation, the high quality potting soil has a mix of textures and nutrients that support the plant roots. Choosing the right soil is important, but it can be a complex task. According to recent studies, cannabis grows best with minimal fertilization, and even if you give it more, it is unable to absorb all of the extra nutrients coming its way. Overfertilization wastes money.
OMRI-Listed = Organic Nutrients
When shopping for growing medium and soil nutrients, look for “OMRI-Listed” labels. The term “Organic” is applied by the USDA only to food and some clothing. An “OMRI-Listed” label shows that the product is certified for organic gardening by the Organic Materials Review Institute.
Here are several brands that make growing medium for growing weed indoors, that can be found at local Minnesota gardening centers, typically at a fraction of the online price:
Soil Additives & Supplements
If the grow medium lacks certain nutrients that the planted strain requires, most soil supplements can be found at a local gardening center or online. Before using additives, study the instructions that come with the seeds.
Most commonly used additives for cannabis growing are:
- Phosphorous - to promote growth of the roots and budding (30 ppm is ideal for the duration of the grow)
- Potassium - promotes disease resistance and hardiness, and helps with the development of terpenes and cannabinoids (200-215 ppm - lower during flowering phase)
- Nitrogen - promotes growth (70-300 PPM - lower during flowering phase)
- Magnesium - promotes growth during the vegetative stage (35-70 ppm)
- Calcium - promotes root growth, but if applied in excess blocks the plants from receiving potassium, magnesium, iron, and manganese.
- pH level refers to the acidity of the soil. Cannabis plants require an acidity between 6 and 7. To adjust the acidity of the soil up or down - use the pH adjuster (example).
Lots of brands on the market mix up multiple nutrients into a single package to optimize a certain aspect of the plant. For example:
Bloom Boosters and Yield Enhancers use phosphorus and potassium to increase the size of the bud:
Here’s a quick guide to fertilizing plants from the University of Minnesota, to provide a broad overview.
Growing and Processing Tools
Here are some tools you will need while growing marijuana indoors (with examples):
Gloves - protect the plant from contamination from your hands by using examination (medical) grade disposable gloves:
Garden Tool Set - to work with the plants
Fiskars (lifetime warranty)
Gorilla (10 year warranty)
Soil Tester - to test the pH levels of your nutrient solutions, grow reservoirs, and the rest of the system - you can use a testing kit or a testing pen.
Shears - to cut down the plant
GROWNEER Bypass Pruning Shears, 8 Inch
Fiskars Bypass Pruning Shears 5/8” (lifetime warranty)
Trimming Scissors - for pruning and trimming
Sticky traps - to catch the bugs and gnats that like to inhabit the soil
Magnifying Glass - to inspect the trichomes development as they transition from clear to cloudy.
Scale
Drying and Curing Cannabis
Drying cannabis is best done inside the unlit and well-ventilated grow tent, by hanging the cut crop upside down for a couple of weeks. Drying of the plant occurs between 60° and 80° F, and relative humidity of 40%-60%. When the branches of the plant snap broken instead of bending - cannabis is finished drying and is ready for curing.
Curing is done in containers (typically in Mason jars). Keep the relative humidity between 60% and 65% and open the jar daily to release the old air from the container - to clear out the extra moisture and the escaping chlorophyll that are coming to the surface of the plant.
Curing Container - to cure the dried bud, to release the harsh chemicals and preserve the terpenes.
Ball Mason Jars - with screw-on lids
Burp Lids for Mason Jars - with a pump, for burping Mason Jars without opening the lid
Montana Glass Jar - for larger quantities of bud
Hygrometer - in addition to the WiFi Hygrometer shown in the “Thermostat, Humidistat, Hygrometer, CO2 Monitor / Controller” section, there are hygrometers that can be placed inside the curing container, to monitor humidity levels without opening it:
6 Pack Mini Small Digital Hygrometer Thermometer for Jars ($15)
4-Pack Mini Digital Electronic Temperature Humidity Meters Gauge ($14)
Jar Humidity Control - to guarantee that the humidity in the jar stays at the idea level to develop and retain the optimal terpene profile, consider using humidifier packs, which control the humidity either by absorbing the extra or releasing moisture where there is not enough present:
Boveda 58% Two-Way Humidity Control Packs (Results in: More dry and less sticky bud)
Boveda 62% Two-Way Humidity Control Packs (Results in: Less dry and more sticky bud)
“Do-It-Yourself” Kits with Growing Tent and Equipment
Bundles allow you to purchase a basic set of components that are guaranteed to work together, and will get you ready to grow. Make sure to understand everything that can potentially come in the bundle before committing to it. In most cases, buying individual components based on your specific requirements may be less expensive and will get you higher quality products:
VIVOSUN - Small Tent Kit for 1-2 plants - $370
- 32”x32”x64” Tent
- LED Light - 200 Watt
- 4 Inch Ducting - 8 Feet
- 2 Ducting Mounting Clamps
- 4 Inch Inline Fan - 2,300 RPM / Air Flow - 190 CFM
- 6 Inch Carbon Filter
- Wireless Thermometer and Hygrometer
VIVOSUN 5 Item Kit - $480-$520 (depending on the current promotion)
- 48”x48”x72” Tent with a Viewing Window
- LED Light - 200 Watt
- 6 Inch Ducting - 25 Feet
- 2 Ducting Mounting Clamps
- 6 Inch Inline Fan - 2,450 RPM / Air Flow 440 CFM
- 6 Inch Carbon Filter
- Wireless Thermometer and Hygrometer
MARS HYDRO Smart Grow System Kit - $750-$840 (depending on the current promotion)
- 48”x48”x80” Medium Tent with a Viewing Window
- Capacity: 6-8 plants
- LED Light - 480 Watt with Smartphone App to control the dimmer function and program the lights
- 6 Inch Ducting - 6 Feet
- 3 Ducting mounting clamps
- 6 Inch Inline Fan - 2,800 RPM, Air Flow 350 CFM, with adjustable speed controller
- 6 Inch Carbon Filter
- Temperature and Humidity Monitor (Hygrometer)
- Rope Hangers (x2)
- Trellis Netting
- 5-Gallon Grow Bags (x6)
- Outlet Power Timer
Useful Books on Growing Cannabis
This guide provides only an outline of the cannabis growing process. If you are serious about learning about growing cannabis and want to make your crop better with every time - stay educated and learn from the professionals. Visit cannabis conferences and read experience-based books. Here are a few ideas:
- The Cannabis Grow Bible: The Definitive Guide to Growing Marijuana for Recreational and Medicinal Use
- Marijuana Horticulture: The Indoor/Outdoor Medical Grower's Bible
- Marijuana Grower's Handbook: Your Complete Guide for Medical and Personal Marijuana Cultivation
- The Cannabis Encyclopedia: The Definitive Guide to Cultivation & Consumption of Medical Marijuana
- Green: A Field Guide to Marijuana: (Books about Marijuana, Guide to Cannabis, Weed Bible)
- Growing Cannabis at Home in Minnesota: A Beginner's Guide
References
Langenfeld, N.J.; Pinto, D.F.; Faust, J.E.; Heins, R.; Bugbee, B. Principles of Nutrient and Water Management for Indoor Agriculture. Sustainability 2022,14, 10204. [link]
Morad D.; Bernstein N. Response of Medical Cannabis to Magnesium (Mg) Supply at the Vegetative Growth Phase. Plants (Basel). 2023 Jul 18;12(14):2676. doi: 10.3390/plants12142676. PMID: 37514290; PMCID: PMC10386616. [link]
Related Pages:
- Minnesota Medical Marijuana

- Minnesota Medical Marijuana Card
- Minnesota Medical Marijuana Caregiver Information
- Medical Marijuana Doctors in Minnesota
- Qualifying Conditions for Medical Card in Minnesota
- Replacement Medical Marijuana Card in Minnesota
- Medical Marijuana Cost in Minnesota
- Medical Marijuana Patients Statistics in Minnesota
- Consequences of Having a MMJ Card in Minnesota
- Minnesota Medical Marijuana Card Cost
Speak with a Cultivation Consultant in Minnesota
Are you looking for advice on how to start cannabis cultivation or how to modernize your existing cultivation facility?